A Dihedral is simply 2 converging angles. What this means when related to paddle design is by incorporating 2 slight angles on the powerface we can direct the water to flow evenly to each side of the paddle, which reduces or eliminates flutter depending on the efficiency of the angles.
Think of the bow of your canoe. It has a center line with 2 symmetrical sides to 'split' the water and push through it keeping you in a straight line. If the bow was square as a brick you can imagine the difficulty you would have in tracking.
We obviously don't want a paddle as angled as a bow, but the concept is the same. Using a very low angle we can still provide plenty of blade catch but gain the advantage of reduced flutter and an easier, less tiring stroke.
Now comes the obvious question, If a dihedral offers an advantage why dosen't every paddle have one? As with most things in life, the answer is cost. It takes more time, tooling, and trained workers to make the angles, so most manufactures simply don't do it. You see it more often on synthetic paddles where using a mold dosen't increase any manufaturing costs since the mold is only made once.
Since you are making one paddle that will be yours time and effort are not a major issue, what's an extra 30 minutes of shaping in the long run.
Wednesday, April 13, 2011
Make a Canoe Paddle - Finishing (Step 4)
The last thing to do with your new canoe paddle is to put a protective finish on it. You have 2 main choices in types of finish. Surface coatings and penetrationing coatings.
Surface coatings are any of the 'paint' type finishes such as Varnish, Enamal, Paint, ect..
Penetrating coatings are things like Linseed oil, Danish Oil, ect..
The main difference is maintance versus comfort. The surface coatings are lower maintance, protect the wood better in regards to bumps and nicks. But the tradeoff is a surface that is harder on your skin.
The oils provide a soft comfortable surface for your hands, but require more maintance with frequent wipedowns and provide little to no protection from rocks, sand, ect..
In the end it's up to you which you go with, both have strong positives.
For this example i'm using varnish for its low maintance properties. The application is pretty straightforward and the pictures are shown after 2 coats we're applied.


Tuesday, April 12, 2011
Make a Canoe Paddle - Shaping (Step 3)
Now that all your glue has dried it on to step 3, shaping the paddle.
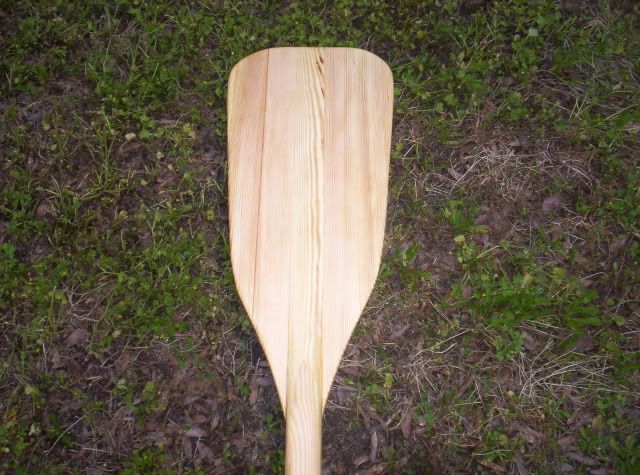
Begin with the blade. For the shape you have a few options. You can trace a paddle you already own, try to copy a picture of one, or simply freehand. As long as it's the general shape of a paddle it will work. Don't be too concerned that you'll make a huge mistake. Just go with a shape your comfortable with.
For this example I used my tape measure and freehand to make a fairly standard shape. I did the layout on the backside (non-powerface) of the paddle since this surface is flat compared to the powerface which is the stairsteps still. The reason for this is so I can use my jigsaw easier on the flat surface. If your using a bandsaw or handsaw either side will work.
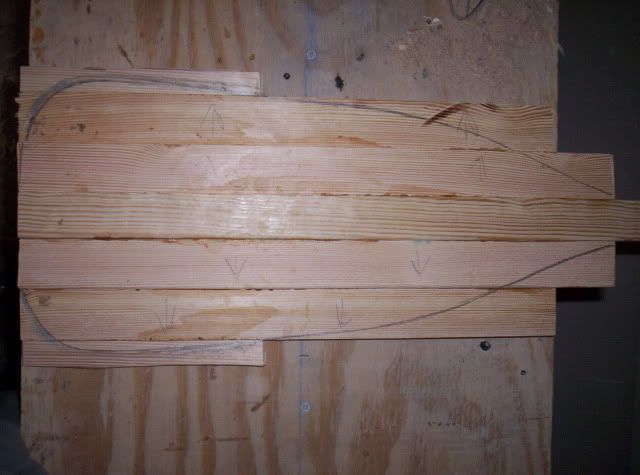
Next cut and shape to the final size. I normally use my jigsaw and rasp file, it's quick and accurate.
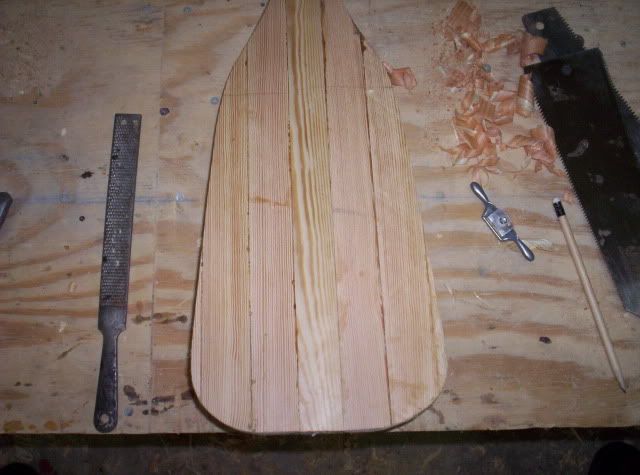
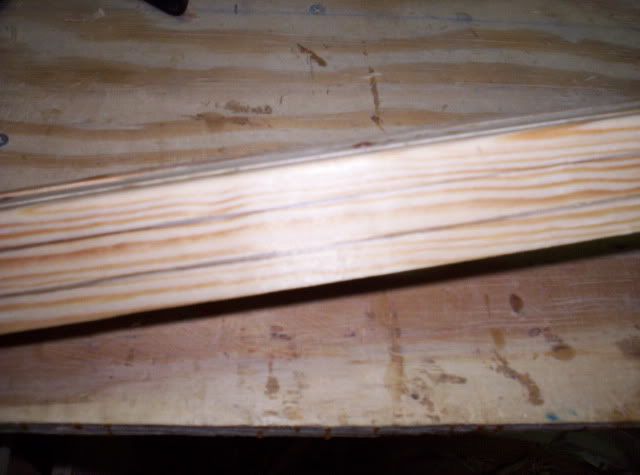
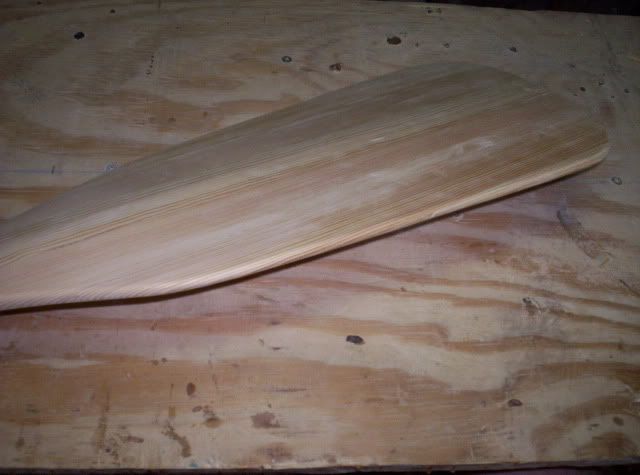
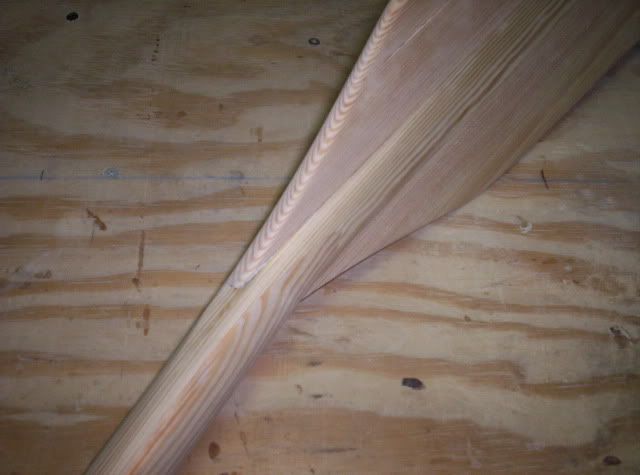
Now we'll move onto shaping the power face. As mentioned earlier we're making a dihedral which is simply two intersecting angles. This is part art, part sience. Take a little time to think about the wood as you remove it and you'll do fine.
The first step is to draw a pencil like all the way around the permiter of the edge. Mine is 1/4" from the backside of the blade.
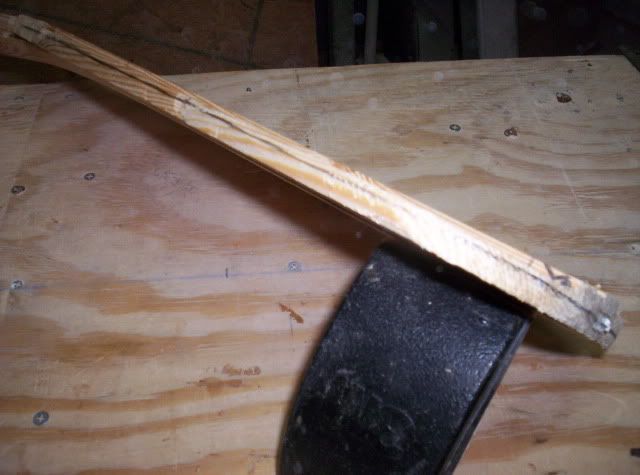
Then I used my hand plane to remove the wood at an angle to this line. Think of the very centerlide of your paddle as one point and this line as the second point, and simply connect the dots.
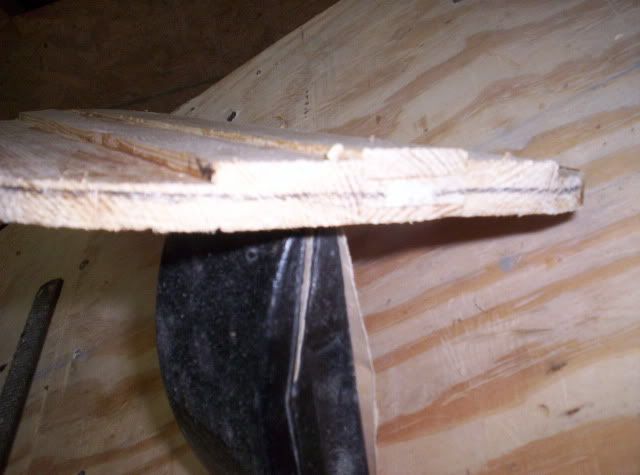
Here you can see one side angled and the other still a staircase.
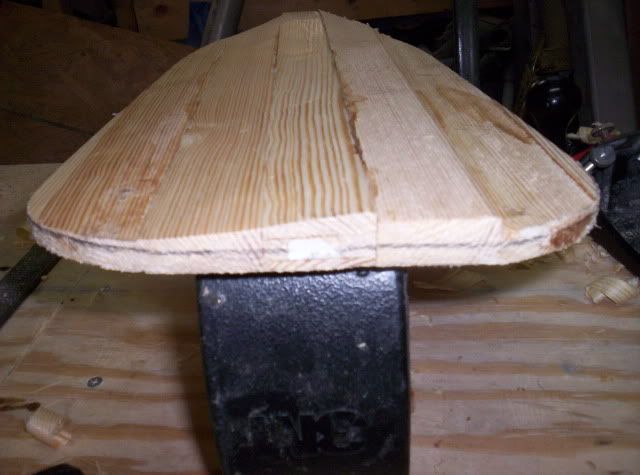
Next do the other side to match. Work slow and feel your work with your fingers, they can see things your eyes can't.
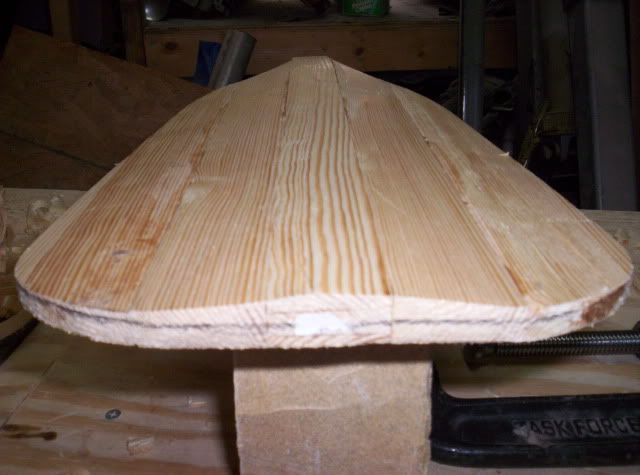
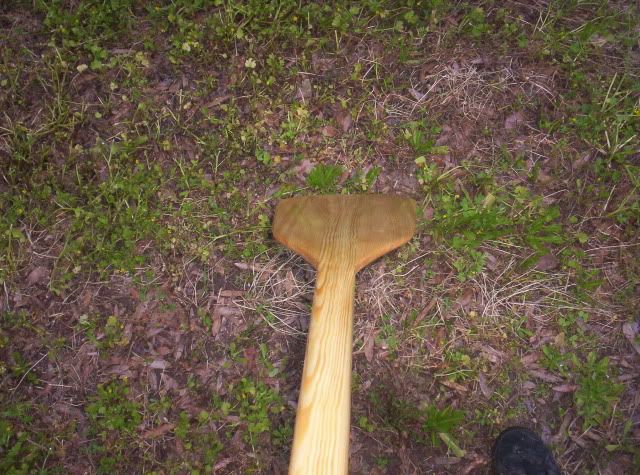
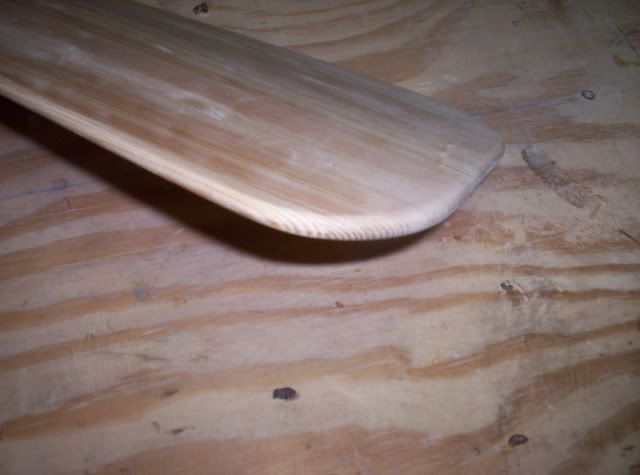
The last step I do is to 'flatten' the last 3-4" of the blade. The majority of the blade still has the dihedral but flattening the tip has 2 advantages. The first is a stronger catch when it first enters the water, the second is some slight weight reduction. The tip is the fathest point from your lower hand when you paddle so any weight removed here is felt the most.
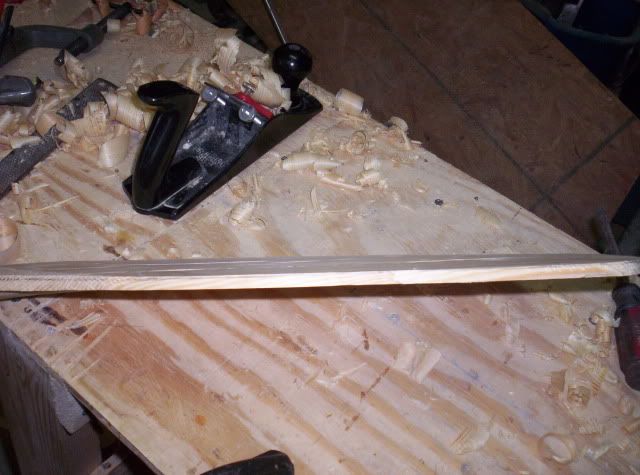
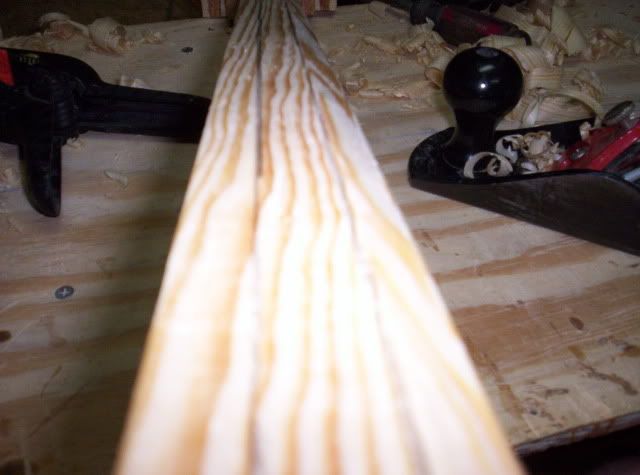
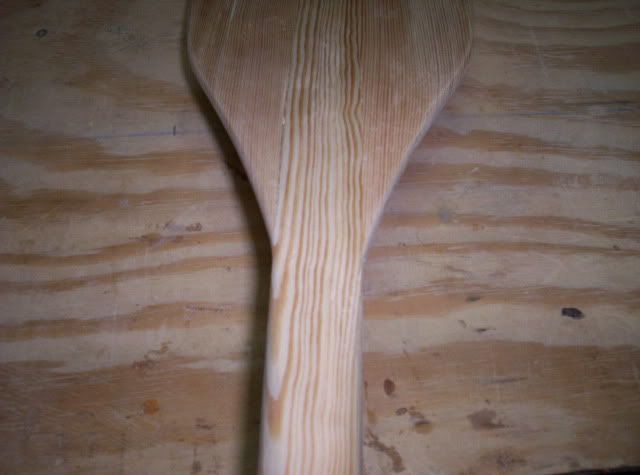
When your satisfied with your rough blade shape it's time to move onto the shaft.
For the shaft i'm using 3 tools to shape. The first to remove the majority of the wood is the hand place, second is the spokeshave and rasp file to finish the rounding.
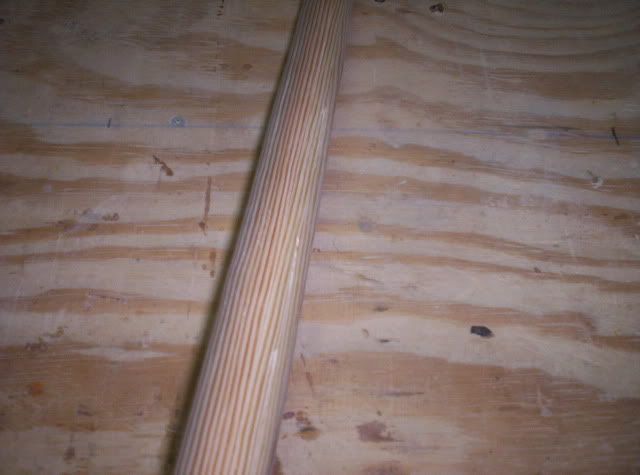
Draw 2 lines on each side that split the width into 3 parts. What you end up with is a total of 8 lines all around the shaft. Just like before think of them as playing connect the dots to remove each corner at a 45 degree angle.
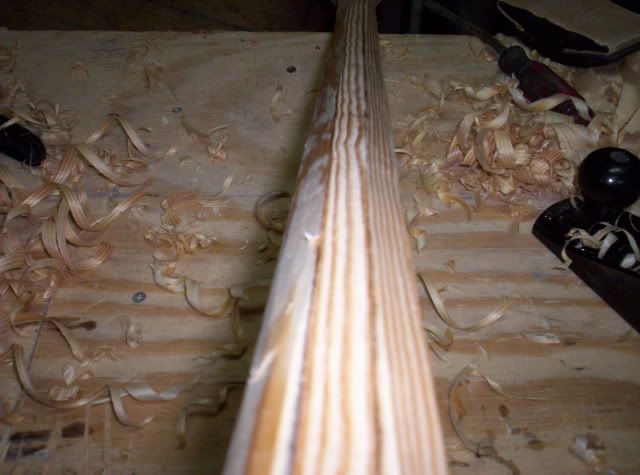
Next move onto using the spokeshave and/or rasp to round the shaft. If you don't have either tool you can set your hand plane to very shallow and use it and sandpaper to get teh same result. Just be VERY careful not to catch the grain the wrong way with the larger plane.
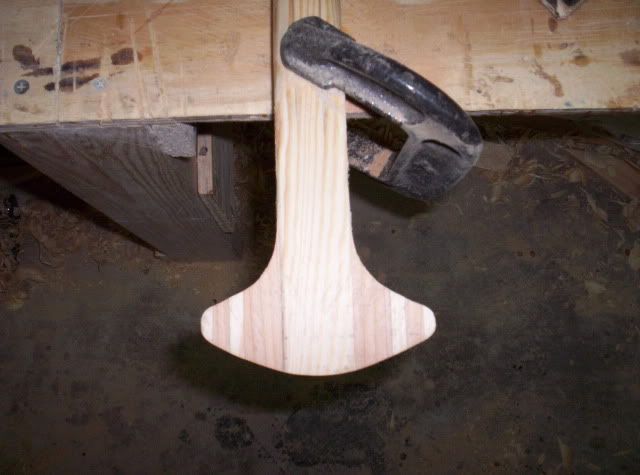
Next I attach a strip of the scrap wood onto the handle to thicken it. You can do this or leave it as-is depending on the type of handle you want.
Now mark and cut out the handle shape. It's helpful to figure out your design on paper and cut it out as a template to trace onto the wood.
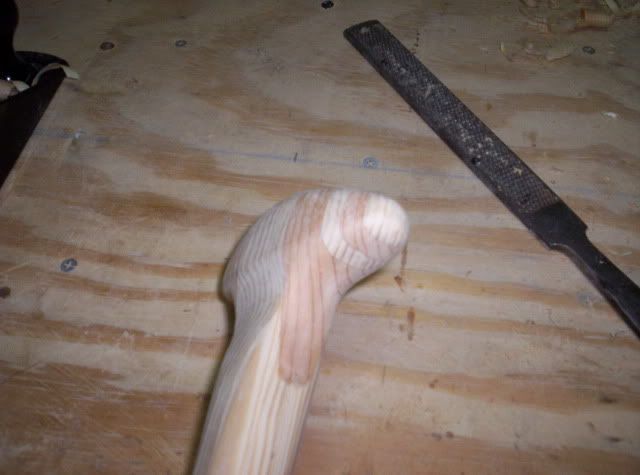
Using your jigsaw, file and sandpaper cut it to shape and begin rounding the edges.
Every minute or so double check your progress by gripping the grip as you would when paddling. Remember you can always remove more materal as you go.
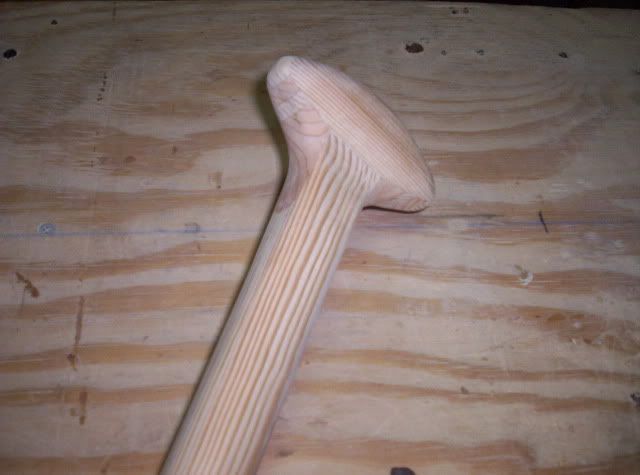
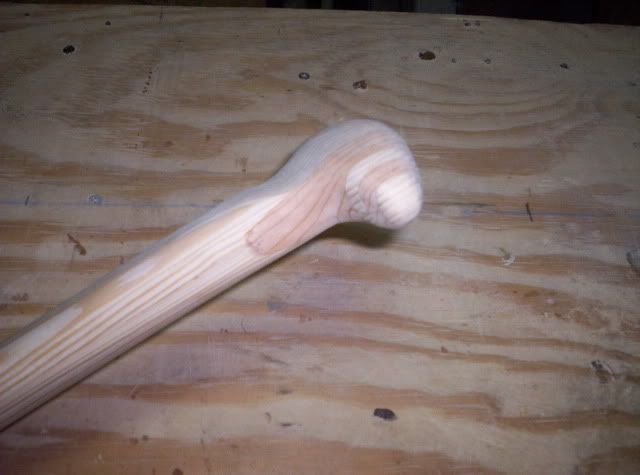
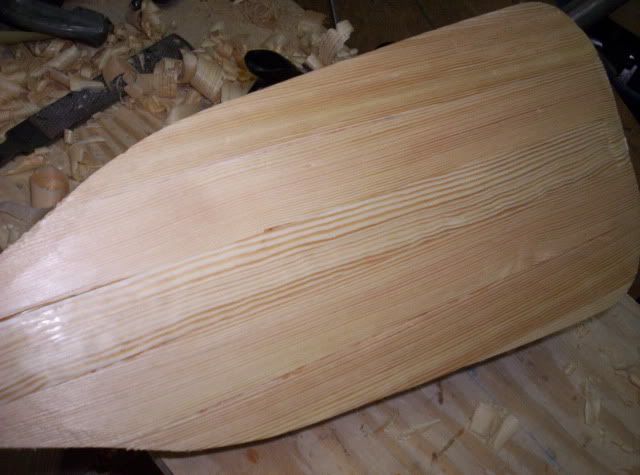
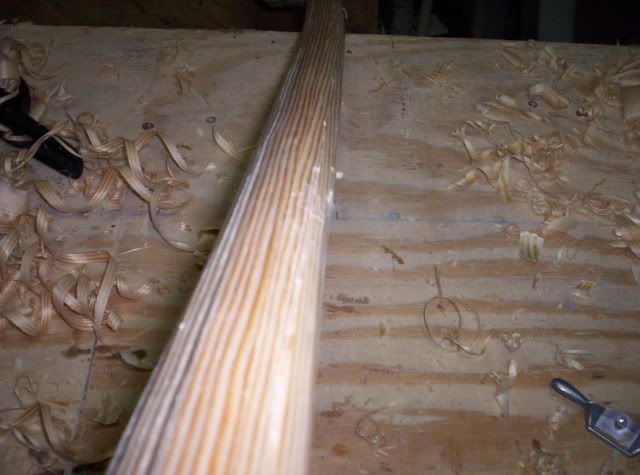
Work your way over the whole paddle, smoothing out and flat spots left on the shaft and sanding the blade on both sides. Also use your file and sandpaper to radius the edges of the blade to a nice curve. This helps with entry/exit of the water and also gets rid of sharp corners which will chip if they hit a rock.
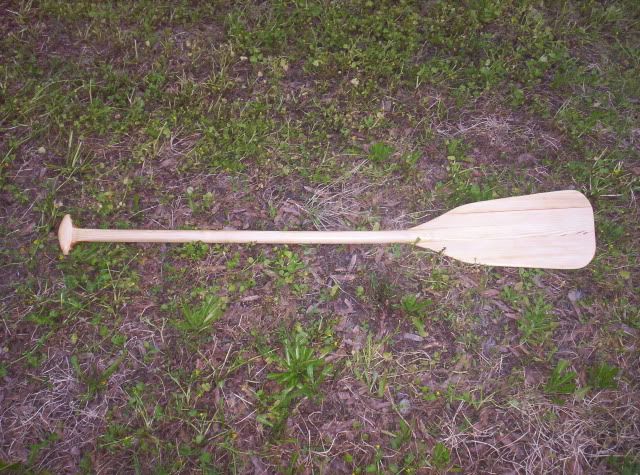
And now your canoe paddle is nearly complete, the last step will be applying a protective finish.
Begin with the blade. For the shape you have a few options. You can trace a paddle you already own, try to copy a picture of one, or simply freehand. As long as it's the general shape of a paddle it will work. Don't be too concerned that you'll make a huge mistake. Just go with a shape your comfortable with.
For this example I used my tape measure and freehand to make a fairly standard shape. I did the layout on the backside (non-powerface) of the paddle since this surface is flat compared to the powerface which is the stairsteps still. The reason for this is so I can use my jigsaw easier on the flat surface. If your using a bandsaw or handsaw either side will work.

Next cut and shape to the final size. I normally use my jigsaw and rasp file, it's quick and accurate.

Now we'll move onto shaping the power face. As mentioned earlier we're making a dihedral which is simply two intersecting angles. This is part art, part sience. Take a little time to think about the wood as you remove it and you'll do fine.
The first step is to draw a pencil like all the way around the permiter of the edge. Mine is 1/4" from the backside of the blade.


Then I used my hand plane to remove the wood at an angle to this line. Think of the very centerlide of your paddle as one point and this line as the second point, and simply connect the dots.
Here you can see one side angled and the other still a staircase.

Next do the other side to match. Work slow and feel your work with your fingers, they can see things your eyes can't.

The last step I do is to 'flatten' the last 3-4" of the blade. The majority of the blade still has the dihedral but flattening the tip has 2 advantages. The first is a stronger catch when it first enters the water, the second is some slight weight reduction. The tip is the fathest point from your lower hand when you paddle so any weight removed here is felt the most.


When your satisfied with your rough blade shape it's time to move onto the shaft.
For the shaft i'm using 3 tools to shape. The first to remove the majority of the wood is the hand place, second is the spokeshave and rasp file to finish the rounding.
Draw 2 lines on each side that split the width into 3 parts. What you end up with is a total of 8 lines all around the shaft. Just like before think of them as playing connect the dots to remove each corner at a 45 degree angle.


Next move onto using the spokeshave and/or rasp to round the shaft. If you don't have either tool you can set your hand plane to very shallow and use it and sandpaper to get teh same result. Just be VERY careful not to catch the grain the wrong way with the larger plane.

Next I attach a strip of the scrap wood onto the handle to thicken it. You can do this or leave it as-is depending on the type of handle you want.


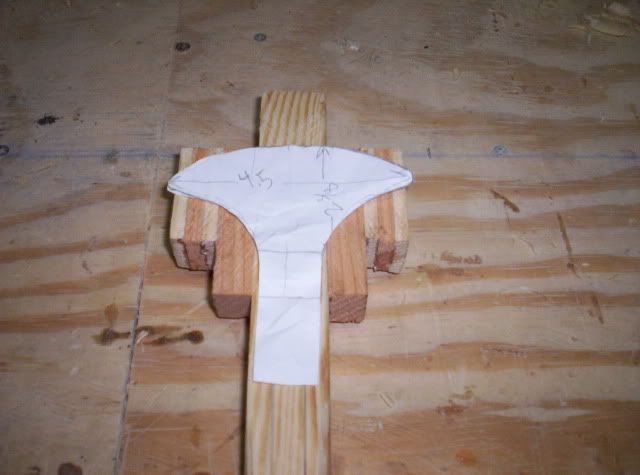
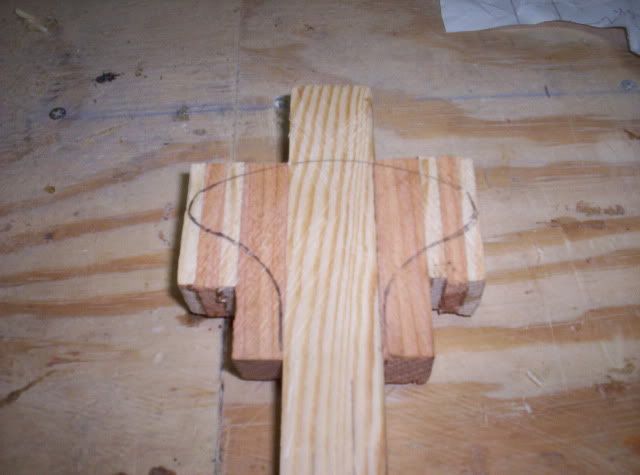
Now mark and cut out the handle shape. It's helpful to figure out your design on paper and cut it out as a template to trace onto the wood.


Using your jigsaw, file and sandpaper cut it to shape and begin rounding the edges.

Every minute or so double check your progress by gripping the grip as you would when paddling. Remember you can always remove more materal as you go.


Work your way over the whole paddle, smoothing out and flat spots left on the shaft and sanding the blade on both sides. Also use your file and sandpaper to radius the edges of the blade to a nice curve. This helps with entry/exit of the water and also gets rid of sharp corners which will chip if they hit a rock.


And now your canoe paddle is nearly complete, the last step will be applying a protective finish.
Sunday, April 10, 2011
Make a Canoe Paddle - Glue-Up (Step 2)
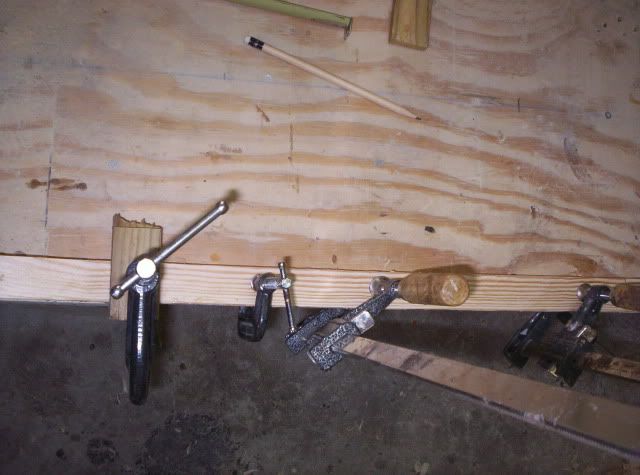
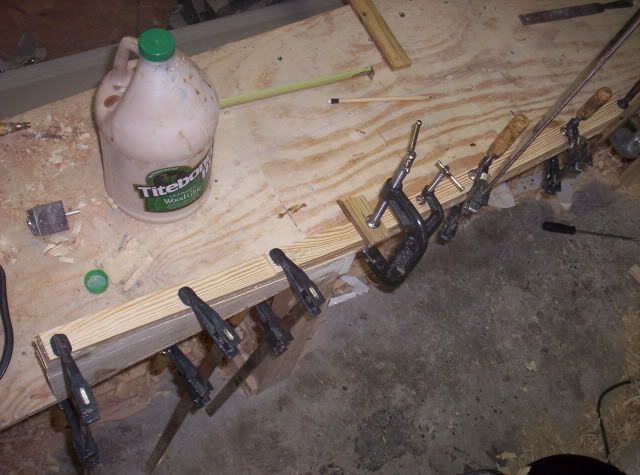
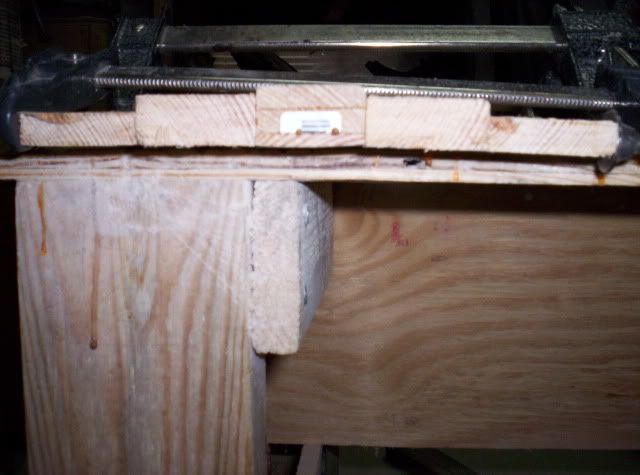
I have a table that I use to glue-up shafts and simply align the strips with the edge of the table to ensure they are all straight. Your wife may flip out if you do all this on your kitchen table so you can improvise and straight surface that will allow you to clap onto. A really easy solition is a door. Simply swing the door open and do your glue-up on the door itself. If doing this on a table or door I would strongly advise using sacrifical wood on the claps and even some cheap plastic on the door or table for protection from glue drips.
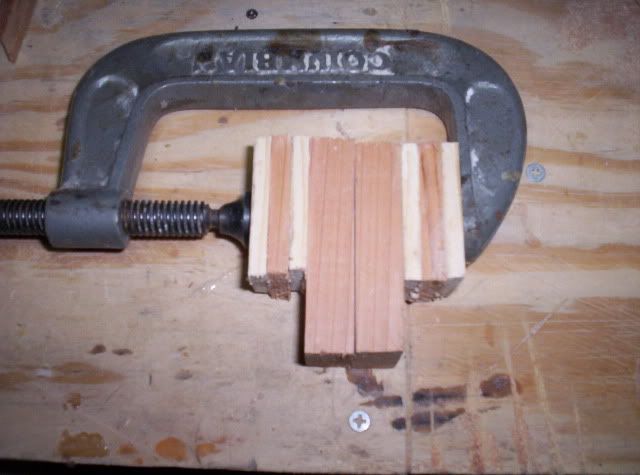
Make sure to use your strongest clap at the neck of the bend as this is the higest tension area, I always use a C-clamp as there is 0 chance of it slipping.

Clamp the shaft in several locations each time making sure the strips line up at each point.
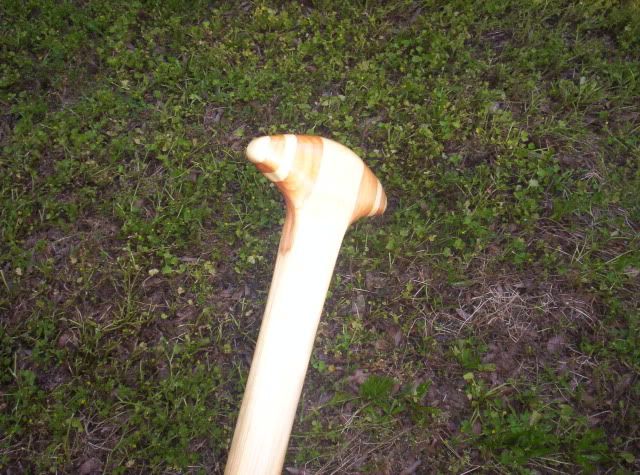
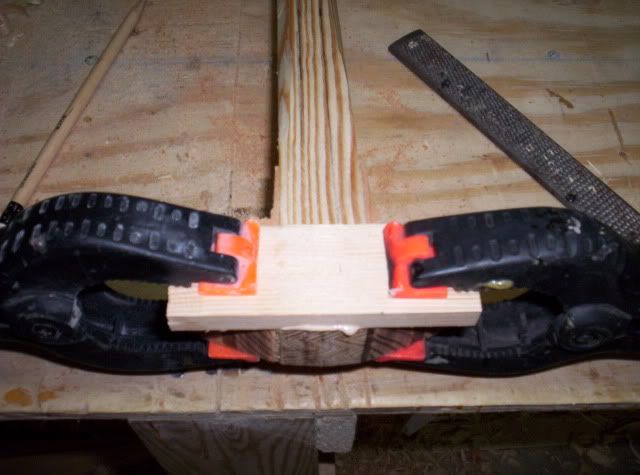
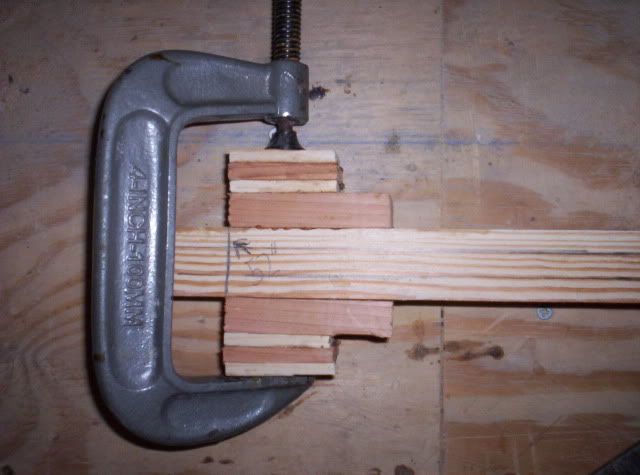
While your shaft is drying we can move onto the grip. For this setup i'll be showing how to make a comfortable modified T-Grip. You'll need 2 sides to glue onto the main shaft. Each will be 3" x 1.5". When attached this gives you a total width of 4.25" to work with. I cheated a little and used some scrap cedar to give a nice design, but there is plenty of wood left from your 2X4 to make the sides.
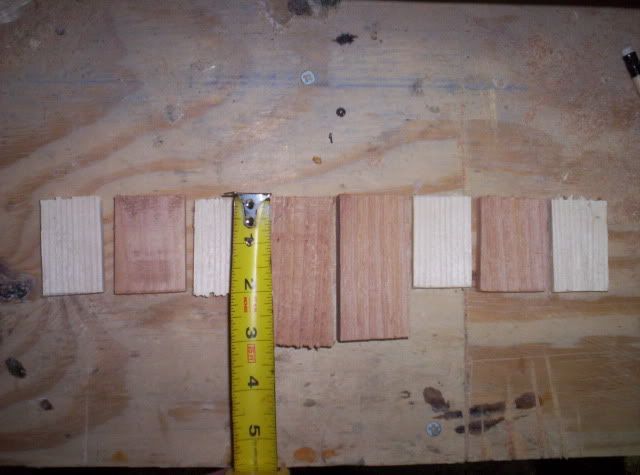
If you have scraps laying around glue them up in any pattern you like and clamp them to dry.

Once your shaft is dried we can move onto the blade glue-up.
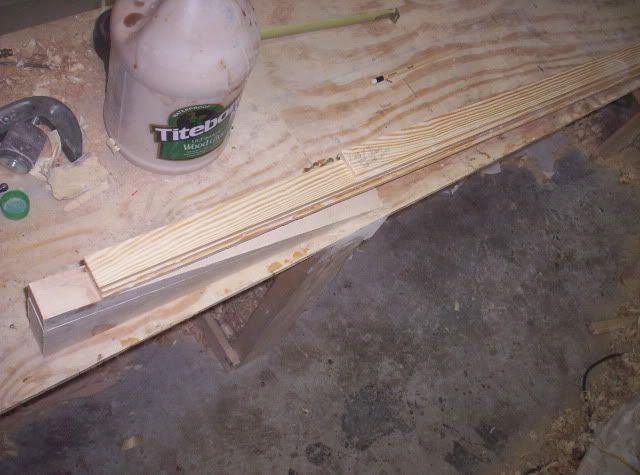
I do some inital shaping on the back (non powerface) side of the shaft before gluing on the blade sections. This isn't required but it will save me a little time later as it's harder to shape once the blade is glued up.
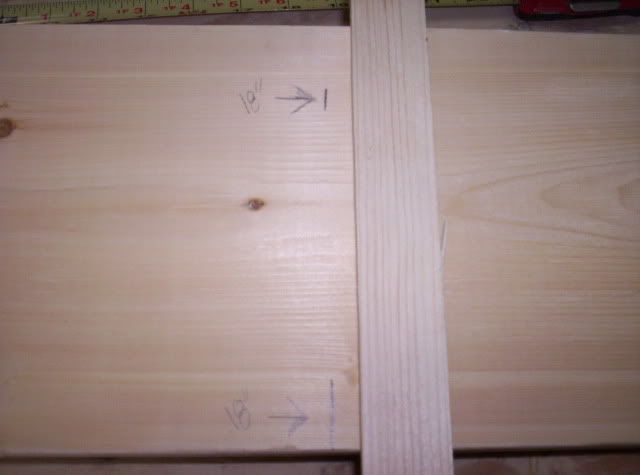
Next cut two 18" lengths from the .600 strip you cut earlier and glue them on the shaft with the back of the blade surface aligned (more on this later)
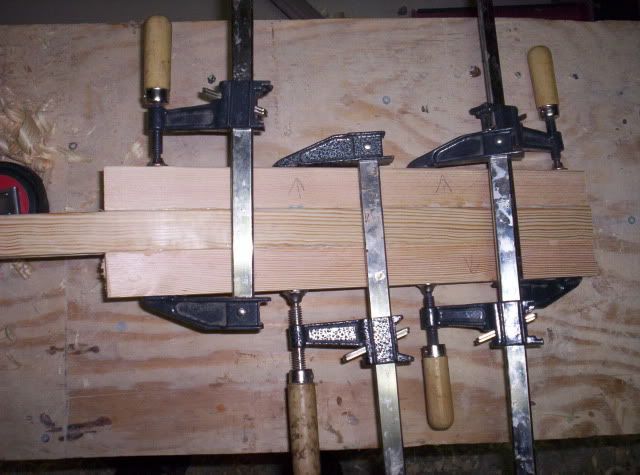
After the glue has dried on the 18" sections, cut two 17" sections from the .415 strip and glue them on the same way, aligning the back surface.
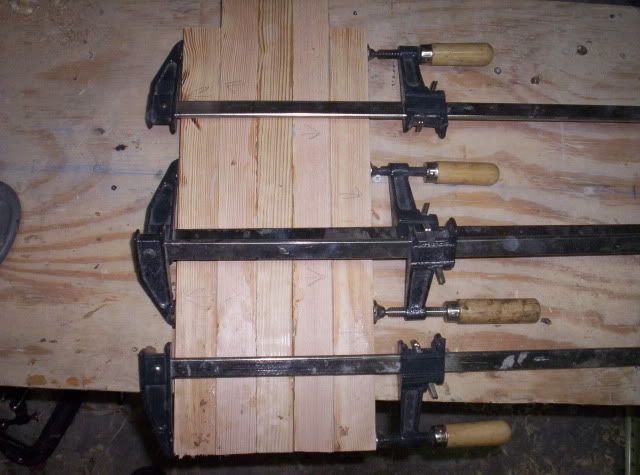
What you end up with is a step like structure on the powerface. This will provide plenty of matereal to cut a dihedrealed powerface (more on this later).
Once the glue on the second set has dried you can add a 3rd set from the .415 strip or leave as-is depending on your desired blade size.
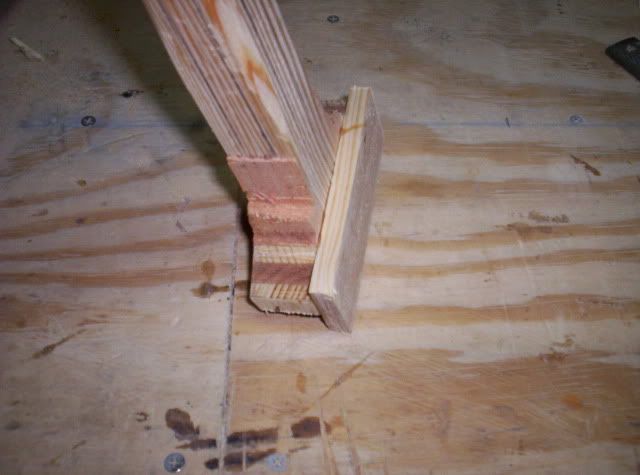
The last step is to glue on the handle parts. Smooth the shaft surface using a shave, file or sandpaper and glue them on.

Make sure to use your strongest clap at the neck of the bend as this is the higest tension area, I always use a C-clamp as there is 0 chance of it slipping.

Clamp the shaft in several locations each time making sure the strips line up at each point.


While your shaft is drying we can move onto the grip. For this setup i'll be showing how to make a comfortable modified T-Grip. You'll need 2 sides to glue onto the main shaft. Each will be 3" x 1.5". When attached this gives you a total width of 4.25" to work with. I cheated a little and used some scrap cedar to give a nice design, but there is plenty of wood left from your 2X4 to make the sides.

If you have scraps laying around glue them up in any pattern you like and clamp them to dry.


Once your shaft is dried we can move onto the blade glue-up.
I do some inital shaping on the back (non powerface) side of the shaft before gluing on the blade sections. This isn't required but it will save me a little time later as it's harder to shape once the blade is glued up.

Next cut two 18" lengths from the .600 strip you cut earlier and glue them on the shaft with the back of the blade surface aligned (more on this later)


After the glue has dried on the 18" sections, cut two 17" sections from the .415 strip and glue them on the same way, aligning the back surface.

What you end up with is a step like structure on the powerface. This will provide plenty of matereal to cut a dihedrealed powerface (more on this later).

Once the glue on the second set has dried you can add a 3rd set from the .415 strip or leave as-is depending on your desired blade size.
The last step is to glue on the handle parts. Smooth the shaft surface using a shave, file or sandpaper and glue them on.

Making a bent Shaft Canoe Paddle
This blog covers in detail step-by-step instructions for making your very own bent shaft wooden canoe paddle. Why would I want to make a canoe baddle you may ask? The answer varies but the real question is why don't you want to?
There's many advantages to making a paddle yourself. Maybe you just completed a strip built project canoe and would like a matching paddle. Or maybe conventional store bought paddles just don't fit your hands right. Whatever your reason a custom made paddle may be the answer. You can adjust the length, blade size, grip diamater, and dimention to fit you exactly providing a much better paddling experience.
The top two questions asked are:
1) How much will it cost?
2) How hard is it to do?
The simple answers are:
1) Much lower than a store bought one.
2) If you can paddle a canoe, you can build your own paddle.
First lets cover cost. Many people may be suprised that it can be done for so little and expect a compromise. These instructions will be using Pine which is one of the heavier, but stronger woods but lighter woods can be substuited and the paddle completed in the same way. Don't be put off by the weight of pine though. A pine paddle is a good choice for durability and won't be akwardly heavy if made correctly.
It is also assumed you own or can borrow any tools needed. The list is small and you can improvise on some of the tools and still obtain the end result.
Second comes the matter of diffucilty. Many assume you need to be a professional woodworker to get professional results. While a woodworking background is helpful it is in no way required. Learning as you go may take a bit longer, but the end result will be worth your time. And there's no satisfaction like using a paddle you made yourself.
Enough with the preamble lets get down to business. Here is a list of the supplies you will need:
A. Consumables
1) A 2x4 from your local lumber yard or box store (Lowe's, Home Depot, ect..)
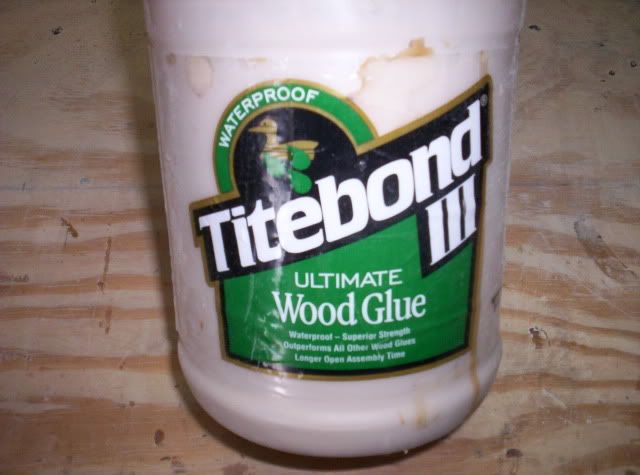
2) Quality *waterproof* wood glue or epoxy.
3) Sandpaper
I only use and recomend Titebond III waterproof wood glue. You can buy this is small quantites for as little as $2-3.
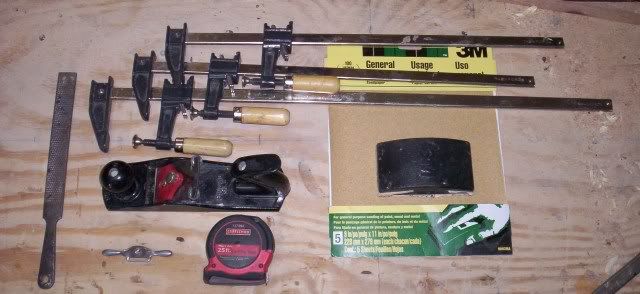
B. Tools
1) Table saw/Band saw or access to one to rip 5 strips.
2) An assortment of clamps
3) Measuring Tape
4) Block Plane, Draw Knife, or Spoke Shave (1 or all 3)
5) File. Preferbaly a wood rasp. A file meant for metal is useable but will take much longer.
6) A Jig Saw or Hand Saw
C. Other
1) Space to clamp up and carve the paddle.
2) An area outside to varnish the finished paddle.
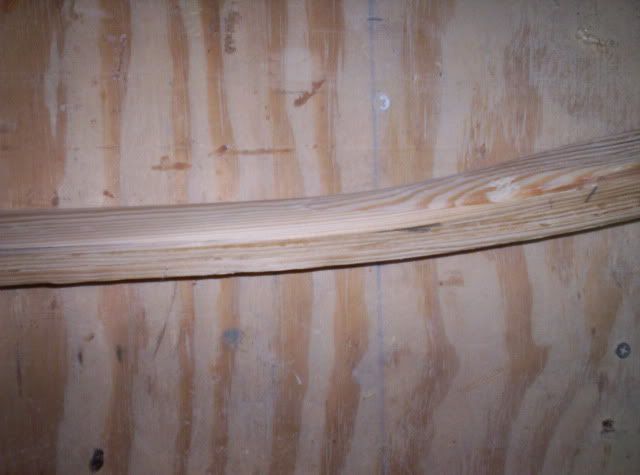
Before getting started i'll cover one of the most important factors influiencing this project, selection of a suitable 2X4. This may seem simple but once you get to the store you don't want to grab the first one on the pile. You want to look for a board with as few knots or defects as possible. You also want to look down the length of the board and find one as straight as possible. Sometimes I may spend 10-15 minutes digging thru the pile to find a suitable board but it's that important if you want as a high a quality paddle as possible.

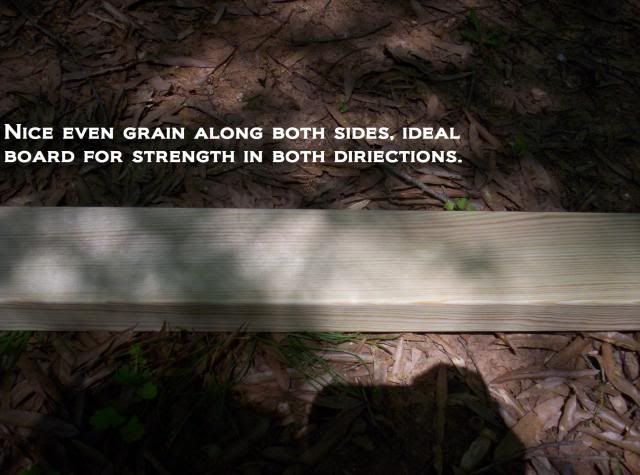
You also want to pay attention to the grain in the board. Idealy you would find a board with tight grain along the 2" side so when cut it provides strength in the direction the paddle will flex.
If you have trouble finding a suitable 2X4 check the 2X8 and 2X10 sections. Usually the larger boards are cut from larger trees and it's easier to find one with minimal defects or at least an area large enough thats defect free for the project.
The board I use in this example is a 2X4X96" from my local Lowes bought for $3.15. It has nice grain along both sides with only one defect, providing plenty of clear board for the shaft strips.
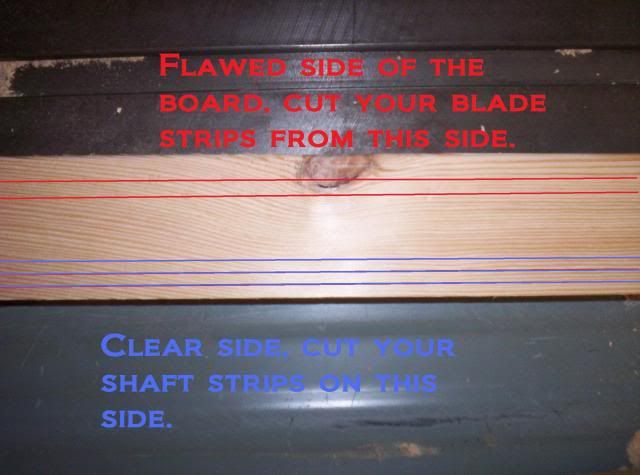
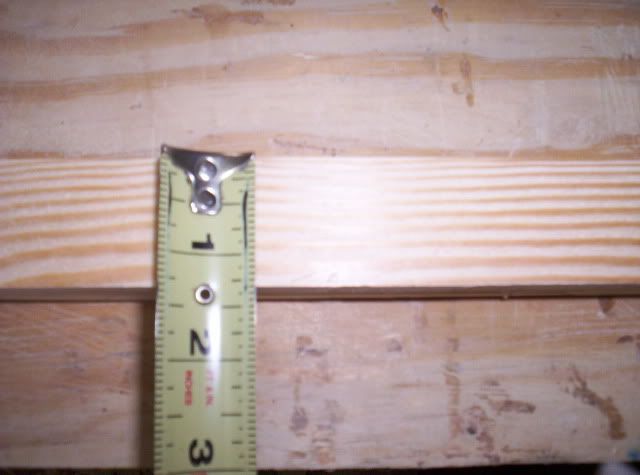
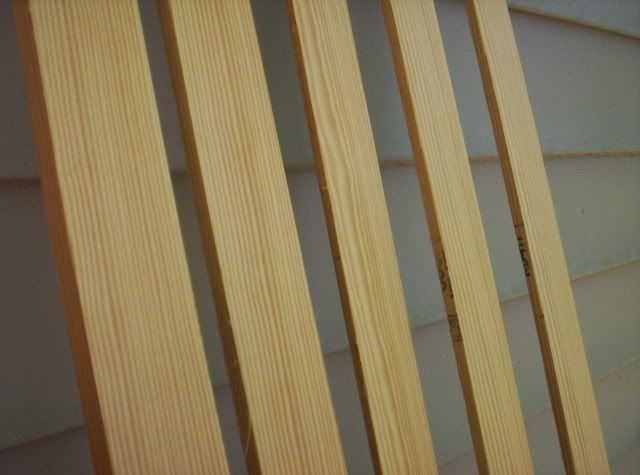
The first step is to rip 5 lengths off the board.
-Three .275 wide strips (just over 1/4)
-One .600 strip (5/8ish)
-One .415 strip (little less then 1/2)
The .275 strips will be stacked to a height of 4 strips for a total of around 1 1/8". If your wanting a larger or smaller grip vary the thickness on them to 1/4 your desired height. I'll be making mine a standard 1 1/8" x 1 1/4" but feel free to vary any of the dementions if you know your after a specific size.
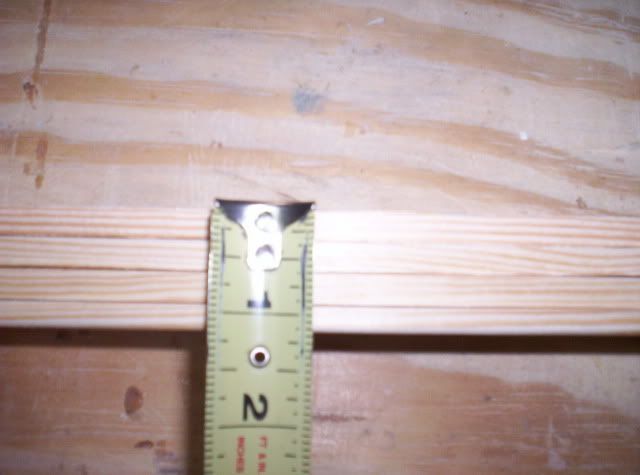
Next cut the 5 strips into 1.25" width or your personal desired width.
Now onto the jig for making a bent shaft. If your making a striaght shaft paddle skip this section.
Most of you wont have a protractor laying around but don't worry, you won't need one to make the correct angle. Here is a step-by-step guide on how to find a 15 degree angle with nothing but a ruler and a straight edge.
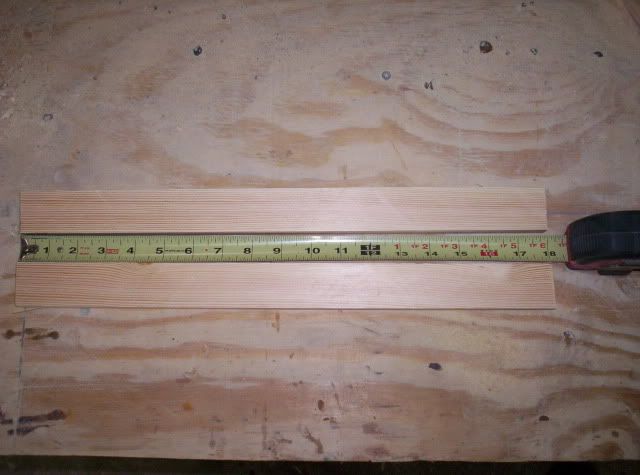
Start by measuring in from the edge the distance that your blade will be. In my example i'm making an 18" blade so at 18" I make a line perpendicular to the scrap woods edge.
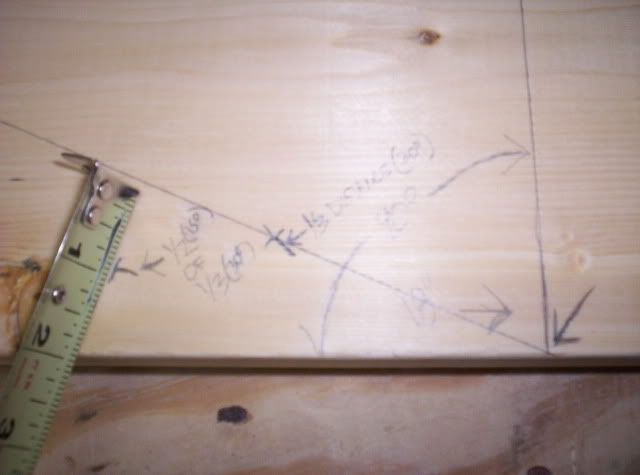
Then place your ruler at about 45 degrees to the bottom edge as show and make a mark at 1/3 the distance. What this means is I lined up my tape measure so at 45 degrees the length was 6 inches. 2 inches is 1/3, or 30 degrees of the original 90 degree angle.
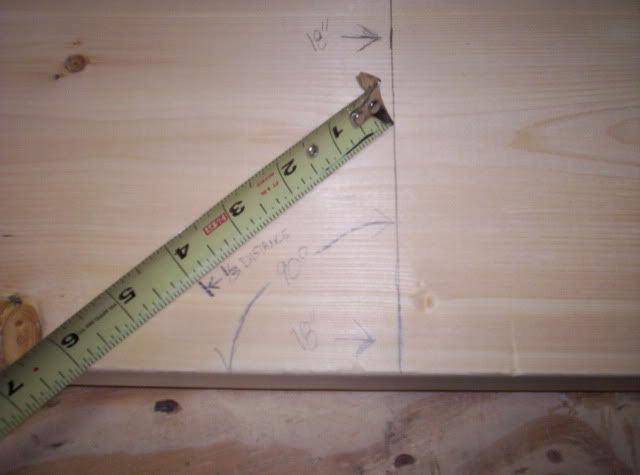
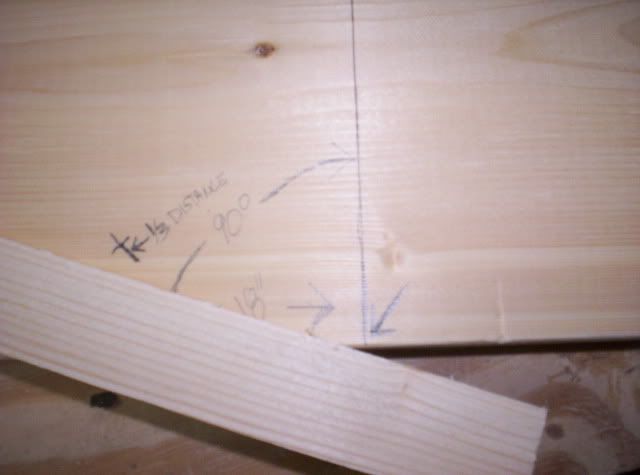
Then do the same to cut the 30 degree in half, for a 15 degree angle. Connect this point with your 90 degree base point and now you have a 15 degree wedge.

Remeber all that usless geometry you learned in 9th grade and forgot? Bet you never know you'd need it to make a canoe paddle!
Next we'll take the three .275 strips we cut earlier and shorten them to shaft length. For making a bent shaft add 2" to your desired length. This accounts for the fact that the bend moves both ends slighly closer to eachother shortining the overall length (again 9th grade math to the rescue).
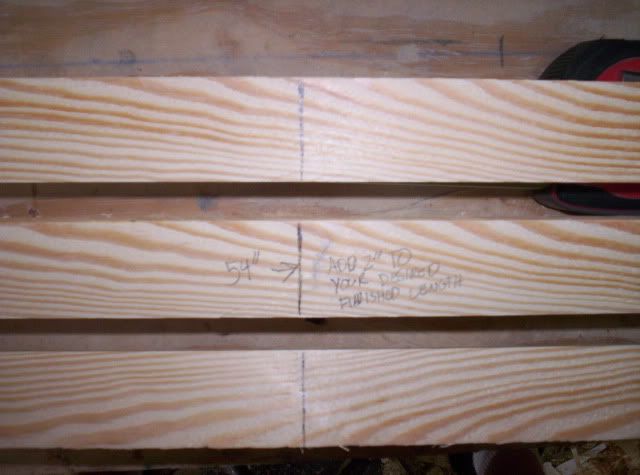
In my example i'm making a 52" paddle, so I cut all 3 boards to 54". I then use one of the leftover peices that is 44" long as my 4th shaft strip, bringing my total thickness to my target of 1 1/8".
There's many advantages to making a paddle yourself. Maybe you just completed a strip built project canoe and would like a matching paddle. Or maybe conventional store bought paddles just don't fit your hands right. Whatever your reason a custom made paddle may be the answer. You can adjust the length, blade size, grip diamater, and dimention to fit you exactly providing a much better paddling experience.
The top two questions asked are:
1) How much will it cost?
2) How hard is it to do?
The simple answers are:
1) Much lower than a store bought one.
2) If you can paddle a canoe, you can build your own paddle.
First lets cover cost. Many people may be suprised that it can be done for so little and expect a compromise. These instructions will be using Pine which is one of the heavier, but stronger woods but lighter woods can be substuited and the paddle completed in the same way. Don't be put off by the weight of pine though. A pine paddle is a good choice for durability and won't be akwardly heavy if made correctly.
It is also assumed you own or can borrow any tools needed. The list is small and you can improvise on some of the tools and still obtain the end result.
Second comes the matter of diffucilty. Many assume you need to be a professional woodworker to get professional results. While a woodworking background is helpful it is in no way required. Learning as you go may take a bit longer, but the end result will be worth your time. And there's no satisfaction like using a paddle you made yourself.
Enough with the preamble lets get down to business. Here is a list of the supplies you will need:
A. Consumables
1) A 2x4 from your local lumber yard or box store (Lowe's, Home Depot, ect..)
2) Quality *waterproof* wood glue or epoxy.
3) Sandpaper
I only use and recomend Titebond III waterproof wood glue. You can buy this is small quantites for as little as $2-3.

B. Tools
1) Table saw/Band saw or access to one to rip 5 strips.
2) An assortment of clamps
3) Measuring Tape
4) Block Plane, Draw Knife, or Spoke Shave (1 or all 3)
5) File. Preferbaly a wood rasp. A file meant for metal is useable but will take much longer.
6) A Jig Saw or Hand Saw

C. Other
1) Space to clamp up and carve the paddle.
2) An area outside to varnish the finished paddle.
Before getting started i'll cover one of the most important factors influiencing this project, selection of a suitable 2X4. This may seem simple but once you get to the store you don't want to grab the first one on the pile. You want to look for a board with as few knots or defects as possible. You also want to look down the length of the board and find one as straight as possible. Sometimes I may spend 10-15 minutes digging thru the pile to find a suitable board but it's that important if you want as a high a quality paddle as possible.

You also want to pay attention to the grain in the board. Idealy you would find a board with tight grain along the 2" side so when cut it provides strength in the direction the paddle will flex.

If you have trouble finding a suitable 2X4 check the 2X8 and 2X10 sections. Usually the larger boards are cut from larger trees and it's easier to find one with minimal defects or at least an area large enough thats defect free for the project.
The board I use in this example is a 2X4X96" from my local Lowes bought for $3.15. It has nice grain along both sides with only one defect, providing plenty of clear board for the shaft strips.
The first step is to rip 5 lengths off the board.
-Three .275 wide strips (just over 1/4)
-One .600 strip (5/8ish)
-One .415 strip (little less then 1/2)

The .275 strips will be stacked to a height of 4 strips for a total of around 1 1/8". If your wanting a larger or smaller grip vary the thickness on them to 1/4 your desired height. I'll be making mine a standard 1 1/8" x 1 1/4" but feel free to vary any of the dementions if you know your after a specific size.
Next cut the 5 strips into 1.25" width or your personal desired width.


Now onto the jig for making a bent shaft. If your making a striaght shaft paddle skip this section.
Most of you wont have a protractor laying around but don't worry, you won't need one to make the correct angle. Here is a step-by-step guide on how to find a 15 degree angle with nothing but a ruler and a straight edge.
Start by measuring in from the edge the distance that your blade will be. In my example i'm making an 18" blade so at 18" I make a line perpendicular to the scrap woods edge.

Then place your ruler at about 45 degrees to the bottom edge as show and make a mark at 1/3 the distance. What this means is I lined up my tape measure so at 45 degrees the length was 6 inches. 2 inches is 1/3, or 30 degrees of the original 90 degree angle.


Then do the same to cut the 30 degree in half, for a 15 degree angle. Connect this point with your 90 degree base point and now you have a 15 degree wedge.


Remeber all that usless geometry you learned in 9th grade and forgot? Bet you never know you'd need it to make a canoe paddle!
Next we'll take the three .275 strips we cut earlier and shorten them to shaft length. For making a bent shaft add 2" to your desired length. This accounts for the fact that the bend moves both ends slighly closer to eachother shortining the overall length (again 9th grade math to the rescue).

In my example i'm making a 52" paddle, so I cut all 3 boards to 54". I then use one of the leftover peices that is 44" long as my 4th shaft strip, bringing my total thickness to my target of 1 1/8".

Subscribe to:
Posts (Atom)